Wireless wheels
Connect a new wheel
To connect a wheel, follow the instructions below:
- Press Add device button on the bottom left corner of Tuner
- Select Wireless wheel from list
- Turn on the wheel
- Select the wheel from the list and press Connect button
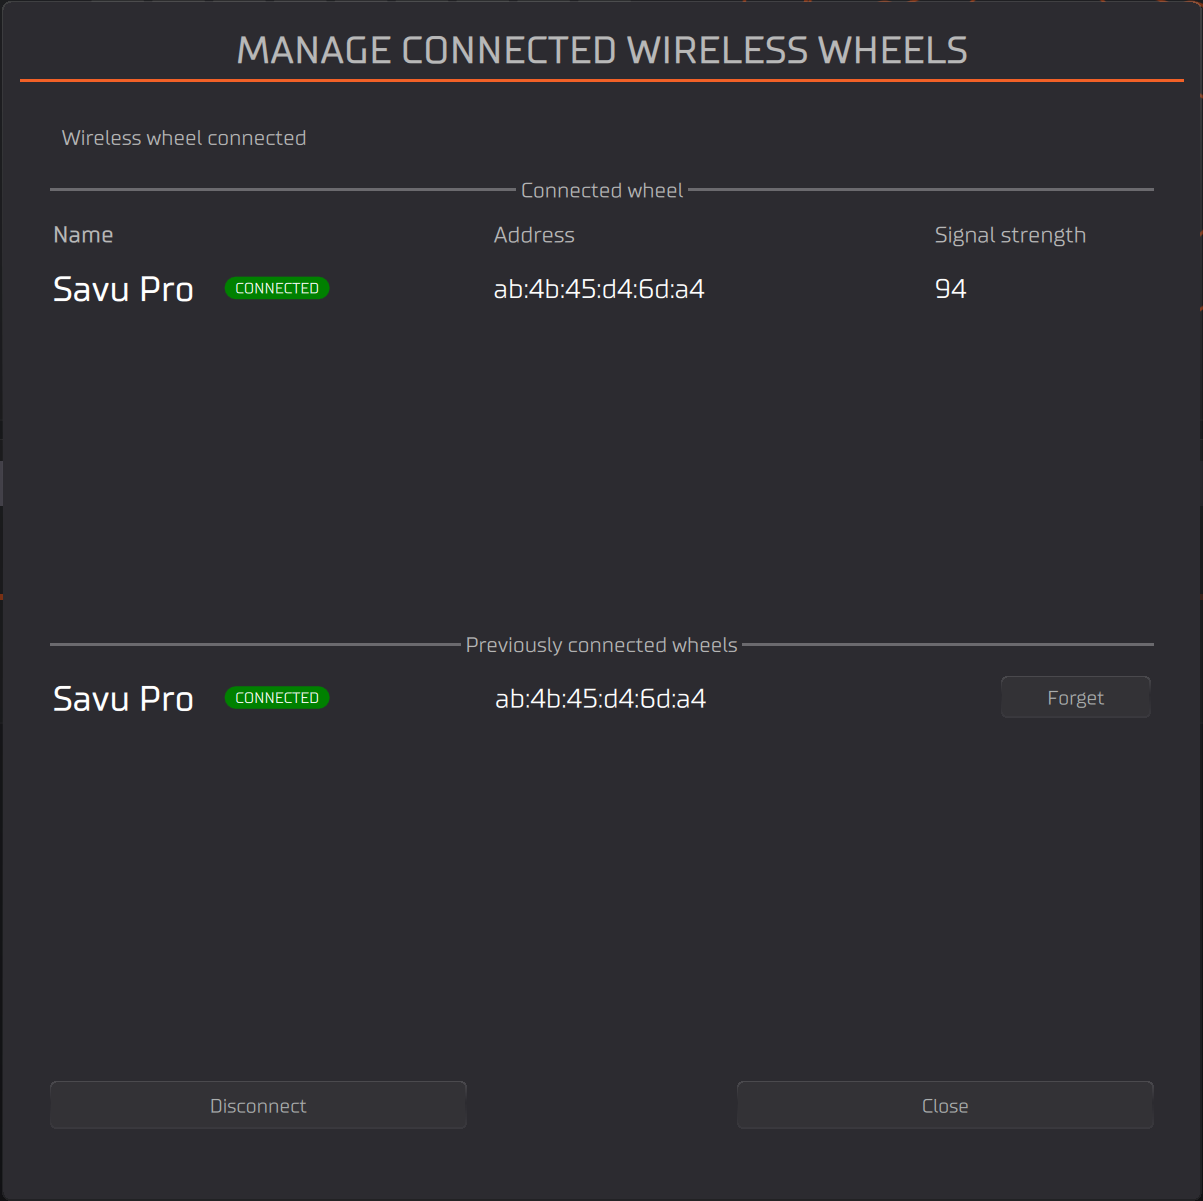
Manage Connections
- Select Wireless Wheel from the device list
- Press Configure button
Disconnect a wheel
- From the wheel config menu press Disconnect button
- Turn off the wheel
Forget a connected wheel
From the wheel config menu press Forget button on the row of the wheel you want to forget
Connect a new wheel via Link Quick Release
Some Simucube Link Compatible wheels can transmit and receive data through the Link Quick Release interface of Simucube 3. Connect these type of wheels by following the instructions below:
- Attach your wheel to Simucube 3 using Link Quick Release
- Ensure that if your wheel has a power-button, it is turned on
Note: Some Simucube Link Compatible wheels may transfer data via Bluetooth, even if power transfer through Link Quick Release is supported.
Configure analog inputs
Open Configure menu
- Select Wireless Wheel from the device list
- Press Configure button
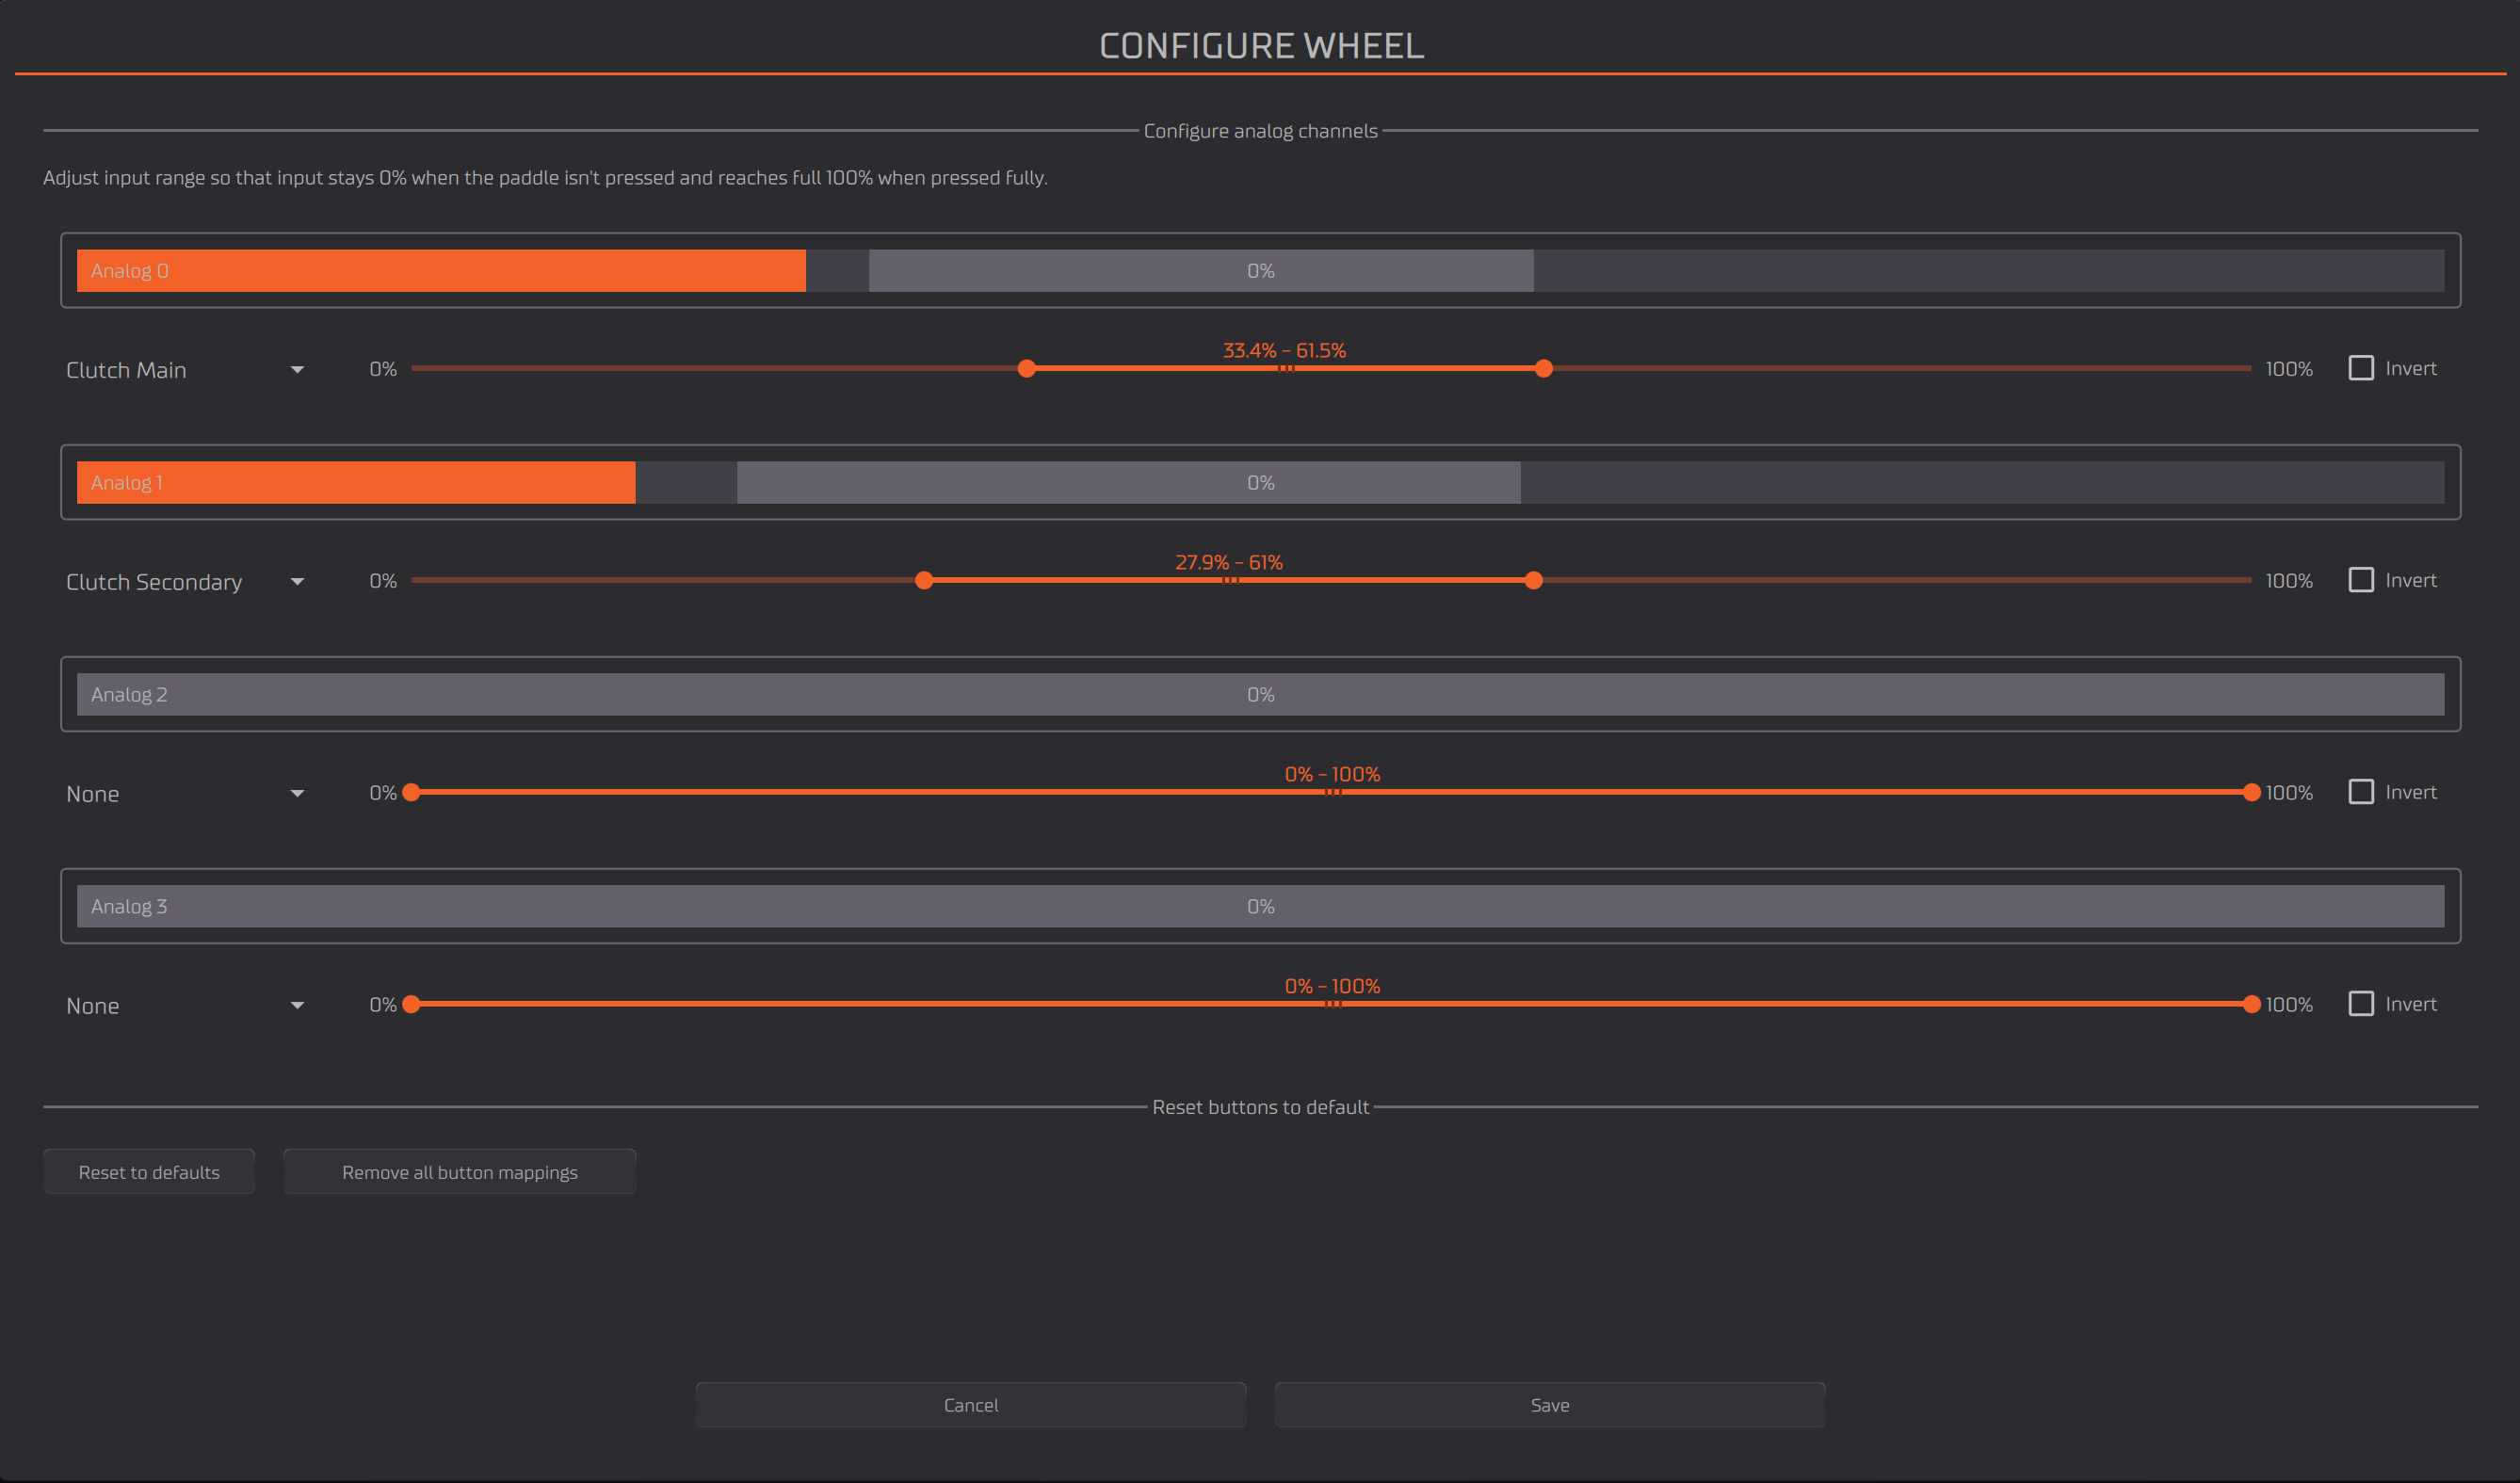
Calibrate analog paddles
- Follow the instructions on the screen and adjust the maximum and minimum values of the analog paddles so that in the end the resting position the output is 0% and when the paddle is fully pressed the output is 100%
Change analog paddles function
- Select the desired function for each analog paddle from the drop-down menu
Input configuration
Open Input tab
- Select Wireless Wheel from the device list
- Select Input tab from the top of the wheel preview
Bite point adjustment
- Use the slider labeled Adjust Bite Point to adjust the bite point
- this will adjust max value of the secondary axis.
- Test the bite point by pressing the analog paddles
LED configuration
Open LED configuration tab
- Select Wireless Wheel from the device list
- Select LED tab from the top of the wheel preview
Adjust LED brightness
- Use the slider labeled LED Brightness to adjust the brightness of the LEDs
Select LED Profile
- Select the desired LED profile from the LED Brightness drop-down menu
Test Telemetry effects
- Press a Test button next to the effect you want to test
- The effect will be displayed on the wheel LEDs
Car configuration menu
Open Car configuration menu
- Select SIMULATOR CONNECTED from the bottom of the left side menu
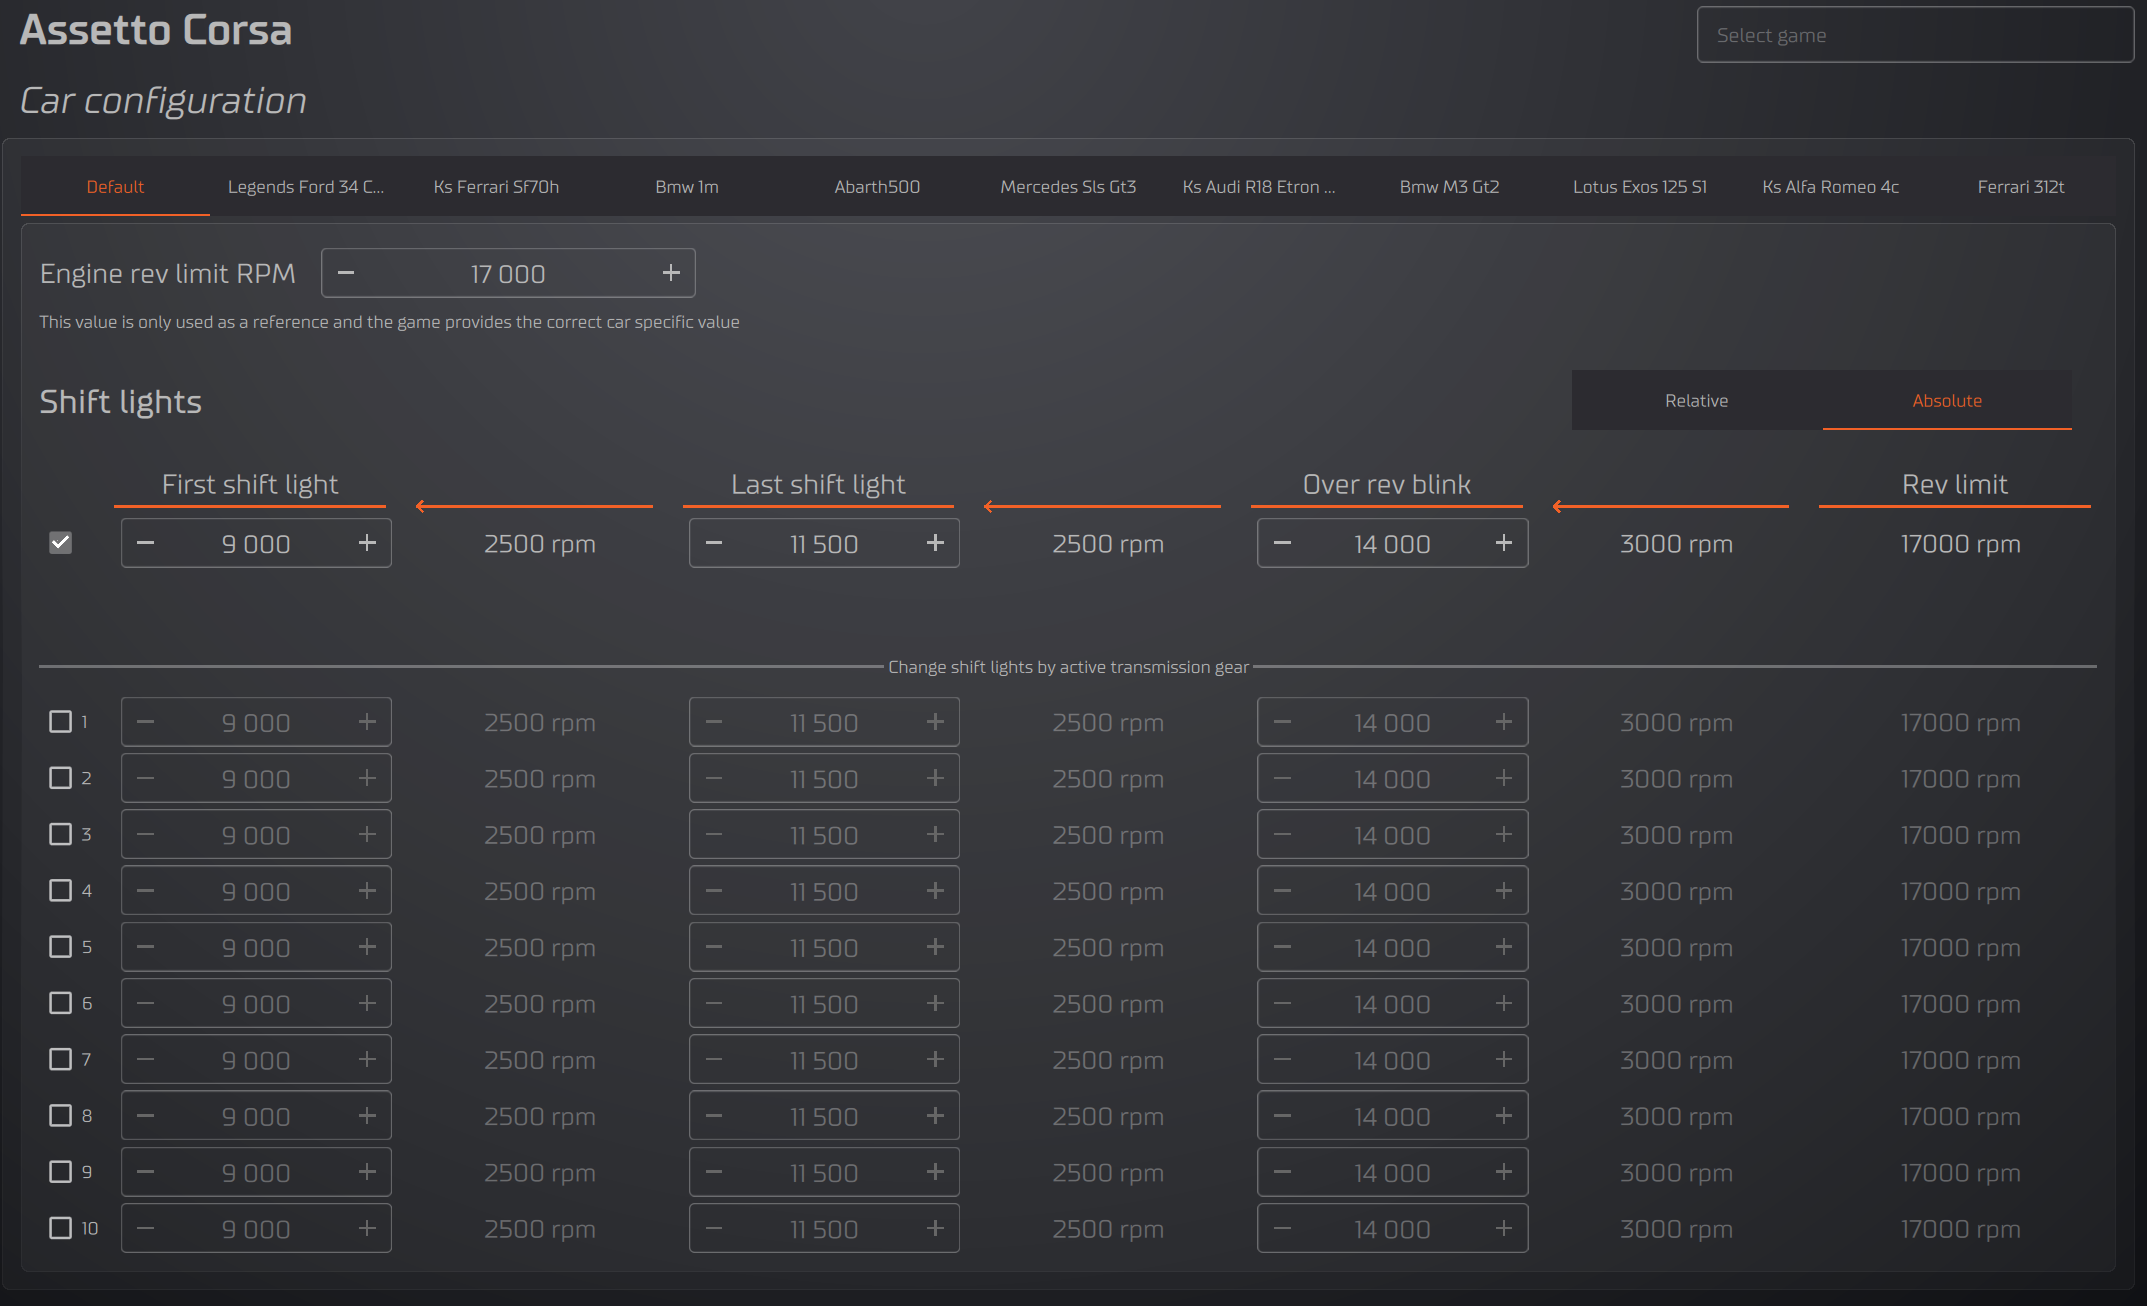
Select game
- The game that is currently running will be automatically selected, but you can also adjust settings for other games by selecting them from the Select game drop-down menu in the top right corner
Selecting a car profile
- If the game you are playing offers the car name through the telemetry, the current car will be automatically added as a tab to the car configuration menu.
- 5 previously used cars will be displayed.
- Check the Use car specific profile checkbox to use a car specific profile
- If the game does not offer the car name through the telemetry or Use car specific profile is not checked the Default car will be used.
RPM range values
First shift light
RPM value for when the first shift light turns on.
Last shift light
RPM value for when the last shift light turns on.
Over rev blink
RPM value for when the blinking starts.
Engine rev limit RPM or Rev limit
RPM value for the maximum RPM of the car.
Adjusting RPM range values
- If the game you are playing offers the car rpm range through the telemetry, the RPM values are ignored and can not be adjusted. To adjust the RPM range, you need to unselect the Use car specific profile checkbox and adjust values in the Default car profile.
- The RPM range can be specified as Relative or Absolute.
- Relative means that the RPM range values are relative to the Engine rev limit RPM and set as percentages between the different RPM values.
- Absolute means that the RPM range values set as RPM values.
- If desired, the RPM ranges can be adjusted separately for each gear using the table in section Change shift lights by active transmission gear.